关于 Spring Cloud Config
Spring Cloud Config 在分布式系统环境下为集中化的外部配置分别提供服务端和客户端支持的项目,不依赖于注册中心,是一个独立的配置中心,支持 git(缺省)、svn、jdbc、native等多种存储配置信息的形式。
Spring Cloud Config 的服务端特性如下:
- HTTP, resource-based API for external configuration (name-value pairs, or equivalent YAML content)
- Encrypt and decrypt property values (symmetric or asymmetric)
- Embeddable easily in a Spring Boot application using @EnableConfigServer
Spring Cloud Config 的客户端特性如下:
- Bind to the Config Server and initialize Spring Environment with remote property sources
- Encrypt and decrypt property values (symmetric or asymmetric)
本文主要记录的是 Spring Cloud Config 的使用,就直接略过什么是配置中心以及配置中心需要的特性之类的介绍了。
工作原理
下图为配置中心的基本工作原理图:
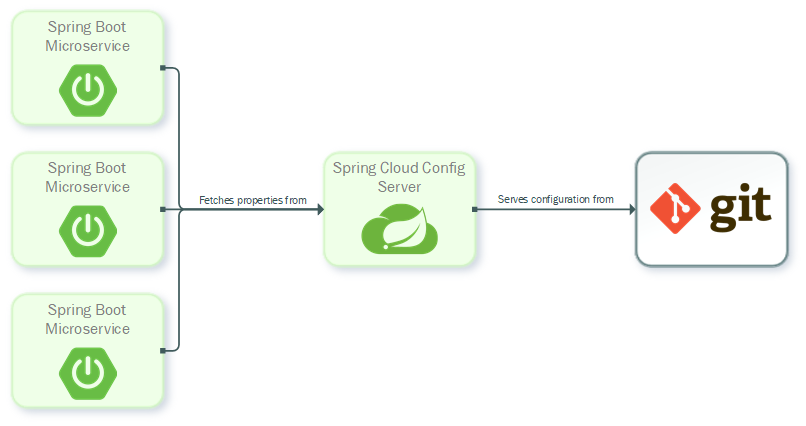
图中的集成了 config-client 的服务在启动后会向 config-server 发起请求,config-server 在接收到请求后,根据配置的仓库地址,将 remote git 服务器上的文件 clone 到本地的一个临时目录中,这个目录也就是一个 git 的 local git repo 仓库,然后 config-server 再读取 local repo 中的文件返回给 config-client。
接下来就直接上手 Spring Cloud Config 配置中心的搭建和客户端的使用。
搭建 git 服务器
git 配置文件
Spring Cloud Config 支持 {application},{profile},{label} 等占位符的使用,在配置 uri 的时候,通过占位符使用应用名称来区分应用对应的仓库应用对应的仓库来使用。
本文使用 docker gogs 搭建的 git 服务器环境。
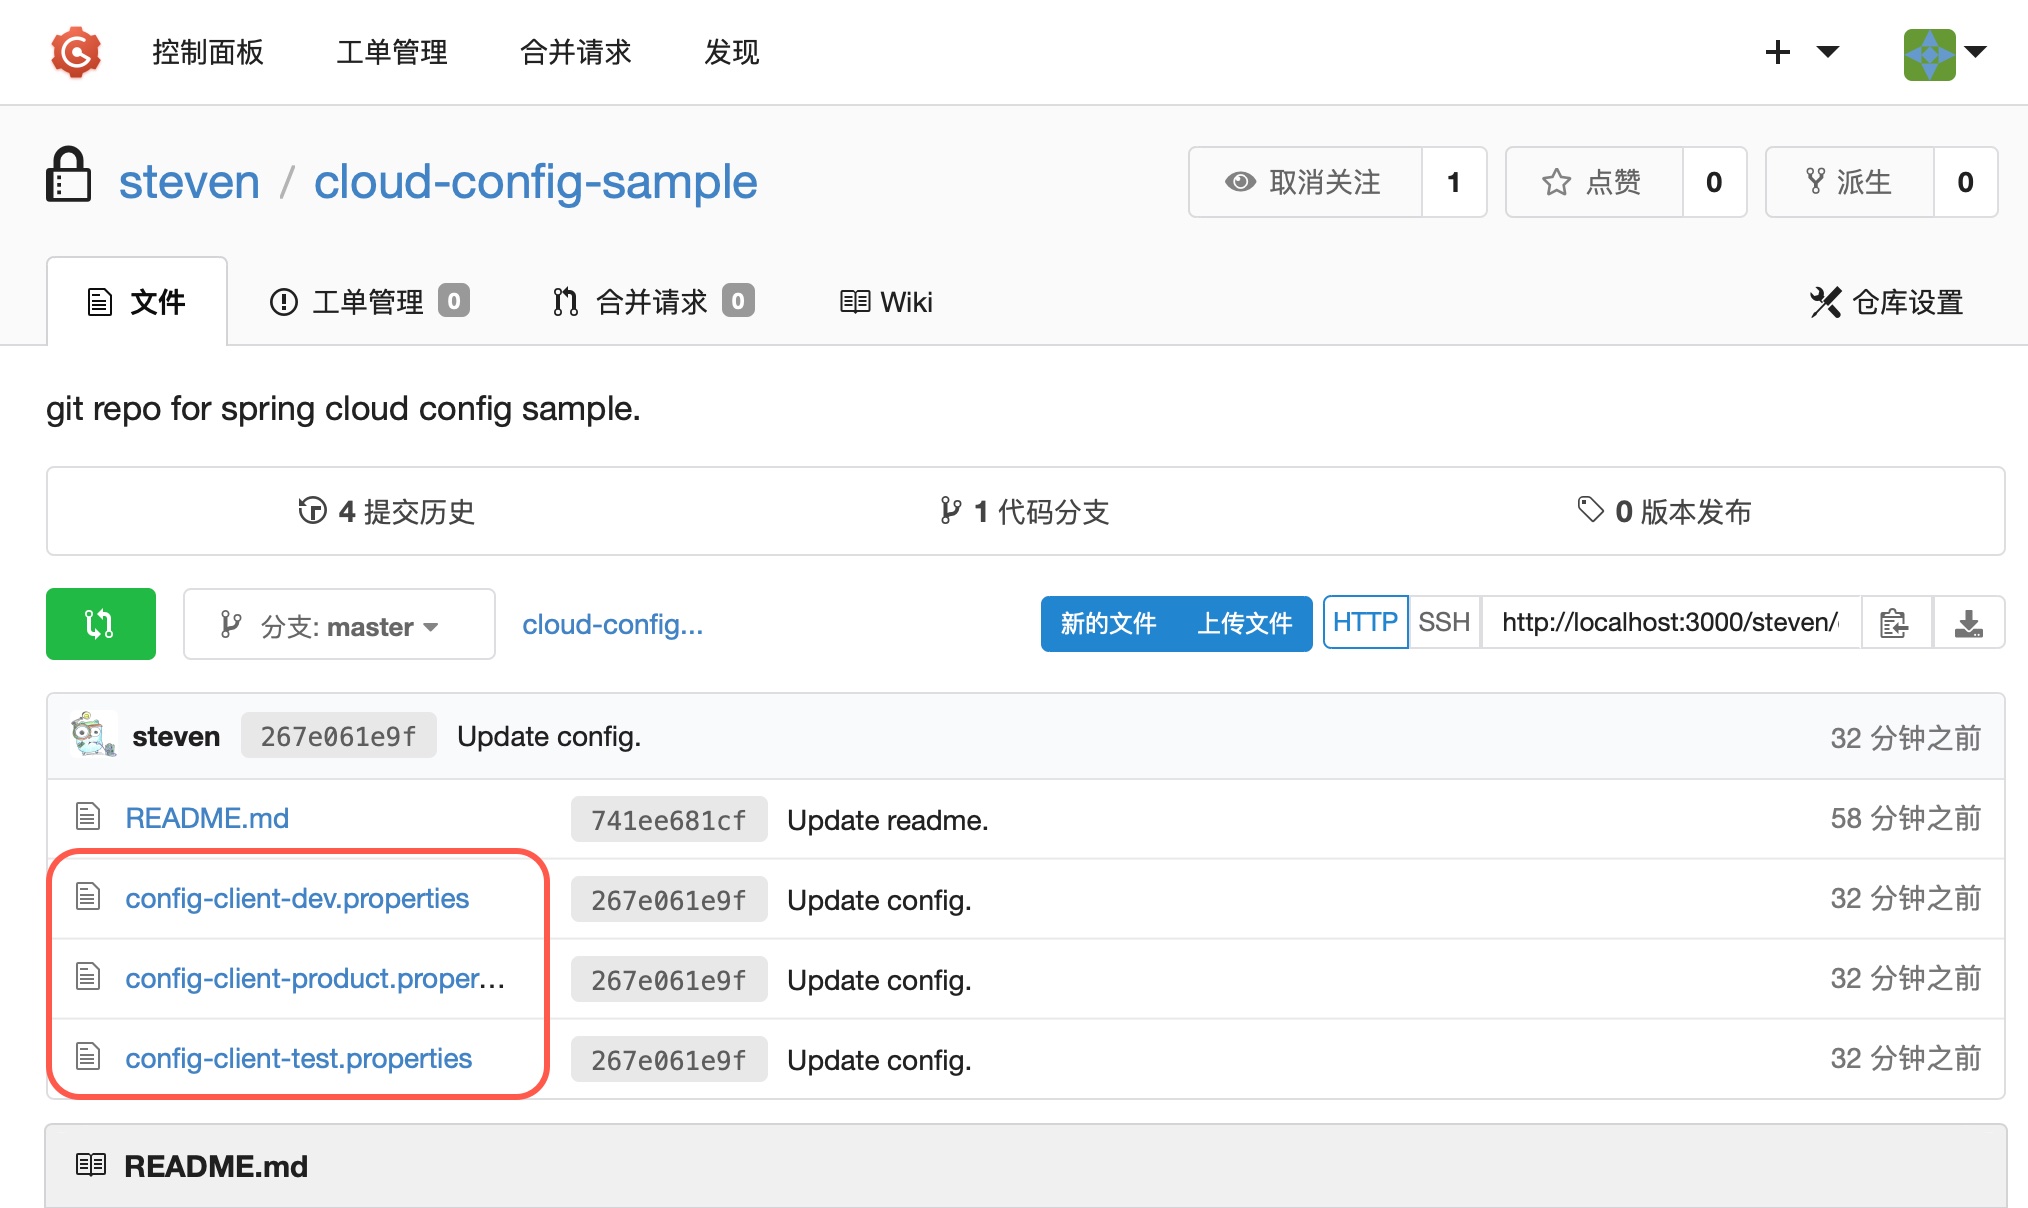
我们先在 git 仓库中添加三个配置文件:config-client-dev.properties, config-client-test.properties, config-client-production.properties,并添加类似如下内容:
1 | steven.config = this is <dev> env. |
三个环境的配置内容分别为 <dev>,<test> 和 <production>。
config server 端
通过 Spring Cloud Config 搭建一个基础的 config server 端,只需要在 Application 入口添加注解 @EnableConfigServer。
创建 config-server 项目添加依赖
首先创建项目 config-server,并在 pom 中添加如下依赖:
1 | <dependencies> |
主程序入口代码添加相关注解
1 |
|
@EnableConfigServer 注解用于开启 Spring Cloud Config 的配置服务功能。
配置文件
在 application.properties 中添加如下配置参数:
1 | spring.application.name=config-server |
配置参数说明如下:
| 配置参数 | 配置说明 |
|---|---|
| spring.cloud.config.server.git.uri | git 服务器的地址 |
| spring.cloud.config.server.git.username | 访问 git 服务的账号名 |
| spring.cloud.config.server.git.password | 访问 git 服务的密码 |
| spring.cloud.config.server.git.default-label | 这里设置为获取分支 master 中的文件 |
这里的 git 远程仓库中分别有下面 config-client 服务需要加载的 dev/test/product 三个环境的配置文件,如下图:
官方支持的 http 查看的 form 有如下几种:
1 | /{application}/{profile}[/{label}] |
其中:
- application 为 client 的配置参数 spring.config.name(如这里示例的 config-client);
- profile 对应于 client 的配置参数 spring.cloud.config.profile;
- label 对应于 client 的配置参数 spring.cloud.config.label;
查询配置 profile 信息
- 下面为获取 dev 的 current.env 配置 profile 信息
1 | ➜ ~ http ':23500/current.env/dev' |
- 下面为获取 test 的 current.env 配置 profile 信息:
1 | ➜ ~ http ':23500/current.env/test' |
config client 端
下面我们创建本次示例的 client 端 config-client。
创建 config-client 项目添加依赖
首先创建项目 config-client,并在 pom 中添加如下依赖:
1 | <dependencies> |
主程序入口代码添加相关注解
如下为主程序入口:
1 |
|
添加测试 controller
1 |
|
这里添加一个可演示动态环境的配置 current.env,会在 bootstrap.properties 配置文件进行配置。
1 | spring.cloud.config.uri = http://localhost:23500 |
这里的配置参数:
| Property | Remark |
|---|---|
| spring.cloud.config.uri | 请求 config-server 的服务地址 |
| spring.cloud.config.name | 表示需要请求的远程配置文件的名称,可访问多个逗号分隔的多个配置文件名 |
| spring.cloud.config.profile | 表示环境信息,如:dev, test, etc. |
| spring.cloud.config.label | 表示需要请求的 git 分支,默认为 master 分支 |
通过 http 测试
1 | ➜ spring http ':30502/hello' |